I have been trying to expand my knowledge of cake decorating lately and wanted to share one of the recipes that I use all the time.
I use this modeling chocolate to sculpt items for cakes. Why modeling chocolate over fondant or gumpaste. I actually use all three all the time but each has it's own benefits.
Fondant: rolls out smooth, it tastes great ( I use a homemade Marshmallow Fondant recipe), I use this for covering cakes and I mix fondant 50/50 with Gumpaste for decorations.
Gumpaste: I rarely use it alone as it dries extremely fast and will crack, I use Gumpaste 50/50 with Fondant for flowers, bows, and other decorations.
Modeling Chocolate: I love that with modeling chocolate you can smooth out your seams (this is much more difficult with fondant) and you can also sculpt with it more like clay rather than using fondant.
Here is the recipe I use:
Modeling Chocolate
10 oz. Chocolate melting disks (the ones that come in different colors I buy mine at Hobby Lobby)
1/3 cup corn syrup
Melt the chocolate in a microwave safe bowl.
Use 30 second intervals and stir after each until chocolate is smooth. When chocolate has a few small pieces left that are not melted, simply stir to melt those rather than returning to the microwave. Once chocolate is melted and smooth add the corn syrup and mix well.
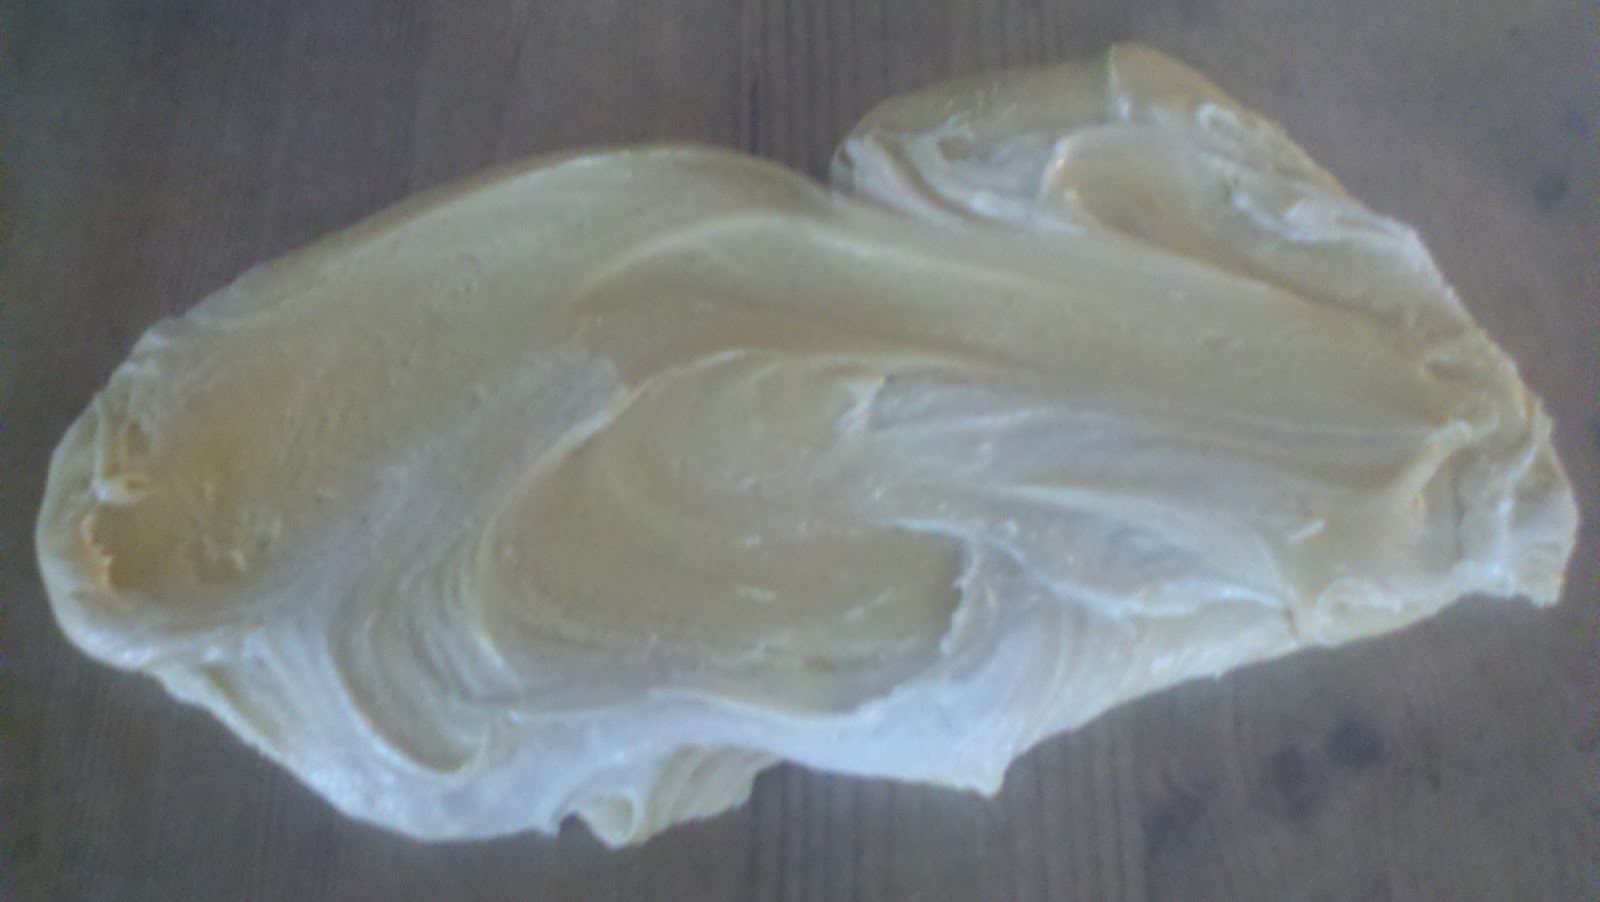
Then pour chocolate/corn syrup mixture out onto wax paper.
Place another sheet of wax paper on top of the chocolate and press to smooth out in an even layer (1/4"-1/2"). Let modeling chocolate cool overnight and it's ready to use. To store I just put the modeling chocolate in a Ziploc bag and store at room temperature. I usually will use it within a week or so.
A tip: You can even cover a cake with this instead of fondant. I have not tried this yet but I'm thinking about it.
Coming Soon: Another Baby shower Cake this coming weekend!! I will also be sharing all the crafts I made for the baby shower as well!!
Monday, February 28, 2011
Sunday, February 27, 2011
Panna Cotta & Florentine Cookies
Hello Everyone! Whew! I've been super busy and first I want to tell all my blogging friends that I'm sorry I haven't been commenting... your posts have all been amazing and I am reading them, it's just usually at 9:00 at night on my phone :)
The February 2011 Daring Bakers’ challenge was hosted by Mallory from A Sofa in the Kitchen. She chose to challenge everyone to make Panna Cotta from a Giada De Laurentiis recipe and Nestle Florentine Cookies.
I have been wanting to try making Panna Cotta for several years now since watching The Barefoot Contessa make it on her show. Surprisingly it was not difficult at all! Panna Cotta is a very pudding like dessert without the sweetness. In my opinion it could have been much sweeter but it was good. I did add one vanilla bean scraped to the recipe. The Florentine Cookies were amazing... with or without the chocolate. I actually preferred them without.
Here is all the info... sorry about the lighting, it's a dreary day here with no sunshine.
1 tablespoon (one packet) (15 ml) (7 gm) (¼ oz) unflavored powdered gelatin
3 cups (720 ml) whipping cream (30+% butterfat)
1/3 cup (80 ml) honey
1 tablespoon (15 ml) (15 gm) (½ oz) granulated sugar
pinch of salt
Directions: 1. Pour the milk into a bowl or pot and sprinkle gelatin evenly and thinly over the milk (make sure the bowl/pot is cold by placing the bowl/pot in the refrigerator for a few minutes before you start making the Panna Cotta). Let stand for 5 minutes to soften the gelatin.
2. Pour the milk into the saucepan/pot and place over medium heat on the stove. Heat this mixture until it is hot, but not boiling, about five minutes. (I whisk it a few times at this stage).
3. Next, add the cream, honey, sugar, and pinch of salt. Making sure the mixture doesn't boil, continue to heat and stir occasionally until the sugar and honey have dissolved 5-7 minutes.
4. Remove from heat, allow it to sit for a few minutes to cool slightly. Then pour into the glass or ramekin.
5. Refrigerate at least 6 hours or overnight. Add garnishes and serve. Hope you love it!
Florentine Cookies
Ingredients:
1 cup (240 ml) (230 gm) (8 oz) granulated sugar
2/3 cup (160 ml) (95 gm) (3
1/4 cup (60 ml) dark corn syrup
1/4 cup (60 ml) whole milk
1 tsp (5 ml) vanilla extract
pinch of salt
1½ cups (360 ml) (250 gm) (9 oz) dark or milk chocolate 2/3 cup (160 ml) (150 gm) (5.3 oz) unsalted butter 2 cups (480 ml) (160 gm) (5 2/3 oz) quick oats ⅓ oz) plain (all purpose) flour Directions:
1. Melt butter in a medium saucepan, then remove from the heat.
2. To the melted butter add oats, sugar, flour, corn syrup, milk, vanilla, and salt. Mix well. Drop a tablespoon full, three inches (75 mm) apart, onto your prepared baking sheet. Flatten slightly with the back of your tablespoon, or use a spatula.
3. Bake in preheated oven for 6-8 minutes, until cookies are golden brown. Cool completely on the baking sheets.
4. While the cookies are cooling melt your chocolate until smooth either in the microwave (1 1/2 minutes), or stove top (in a double boiler, or a bowl that fits atop a saucepan filled with a bit of water, being sure the water doesn't touch the bottom of the bowl).
5. Peel the cookies from the silpat or parchment and place face down on a wire rack set over a sheet of wax/parchment paper (to keep counters clean).
6. Spread a tablespoon of chocolate on the bottom/flat side of your cookie, sandwiching another (flat end) cookie atop the chocolate.
Preheat oven to moderately hot 375°F (190°C) (gas mark 5). Prepare your baking sheet with silpat or parchment paper.
The February 2011 Daring Bakers’ challenge was hosted by Mallory from A Sofa in the Kitchen. She chose to challenge everyone to make Panna Cotta from a Giada De Laurentiis recipe and Nestle Florentine Cookies.
I have been wanting to try making Panna Cotta for several years now since watching The Barefoot Contessa make it on her show. Surprisingly it was not difficult at all! Panna Cotta is a very pudding like dessert without the sweetness. In my opinion it could have been much sweeter but it was good. I did add one vanilla bean scraped to the recipe. The Florentine Cookies were amazing... with or without the chocolate. I actually preferred them without.
Here is all the info... sorry about the lighting, it's a dreary day here with no sunshine.
Panna Cotta
Ingredients 1 cup (240 ml) whole milk 1 tablespoon (one packet) (15 ml) (7 gm) (¼ oz) unflavored powdered gelatin
3 cups (720 ml) whipping cream (30+% butterfat)
1/3 cup (80 ml) honey
1 tablespoon (15 ml) (15 gm) (½ oz) granulated sugar
pinch of salt
Directions: 1. Pour the milk into a bowl or pot and sprinkle gelatin evenly and thinly over the milk (make sure the bowl/pot is cold by placing the bowl/pot in the refrigerator for a few minutes before you start making the Panna Cotta). Let stand for 5 minutes to soften the gelatin.
2. Pour the milk into the saucepan/pot and place over medium heat on the stove. Heat this mixture until it is hot, but not boiling, about five minutes. (I whisk it a few times at this stage).
3. Next, add the cream, honey, sugar, and pinch of salt. Making sure the mixture doesn't boil, continue to heat and stir occasionally until the sugar and honey have dissolved 5-7 minutes.
4. Remove from heat, allow it to sit for a few minutes to cool slightly. Then pour into the glass or ramekin.
5. Refrigerate at least 6 hours or overnight. Add garnishes and serve. Hope you love it!
Florentine Cookies
Ingredients:
1 cup (240 ml) (230 gm) (8 oz) granulated sugar
2/3 cup (160 ml) (95 gm) (3
1/4 cup (60 ml) dark corn syrup
1/4 cup (60 ml) whole milk
1 tsp (5 ml) vanilla extract
pinch of salt
1½ cups (360 ml) (250 gm) (9 oz) dark or milk chocolate 2/3 cup (160 ml) (150 gm) (5.3 oz) unsalted butter 2 cups (480 ml) (160 gm) (5 2/3 oz) quick oats ⅓ oz) plain (all purpose) flour Directions:
1. Melt butter in a medium saucepan, then remove from the heat.
2. To the melted butter add oats, sugar, flour, corn syrup, milk, vanilla, and salt. Mix well. Drop a tablespoon full, three inches (75 mm) apart, onto your prepared baking sheet. Flatten slightly with the back of your tablespoon, or use a spatula.
3. Bake in preheated oven for 6-8 minutes, until cookies are golden brown. Cool completely on the baking sheets.
4. While the cookies are cooling melt your chocolate until smooth either in the microwave (1 1/2 minutes), or stove top (in a double boiler, or a bowl that fits atop a saucepan filled with a bit of water, being sure the water doesn't touch the bottom of the bowl).
5. Peel the cookies from the silpat or parchment and place face down on a wire rack set over a sheet of wax/parchment paper (to keep counters clean).
6. Spread a tablespoon of chocolate on the bottom/flat side of your cookie, sandwiching another (flat end) cookie atop the chocolate.
Wednesday, February 16, 2011
Baby Shower "Gifts" Cake
This cake I made for my sister in law's very first baby shower. As you can see she is having a little girl and everyone is just ecstatic!
Note: I know the pictures are not so great, I forgot my camera and these are taken with my phone. Also, I'm sorry I don't have step by step pictures, I did most of this cake in one night and was super rushed to get it done.
The bottom tier is a 12x12 3 layer cake: Almond/ Vanilla Cake with Cream Cheese Filling (mommy to be's favorite). The "lid" of the gift box is a single layer of cake covered in fondant.
The middle tier is a 9 inch round 3 layer cake: Chocolate Cake with Chocolate Fudge Filling. The "lid" of the gift box is rice krispie treats covered in fondant.
And the top tier is the smallest pan of the Wilton Pillow set. It was pound cake but I did not serve it.
All the fondant is homemade marshmallow fondant and the decorations are 50/50 fondant and gum paste (Satin Ice).
To get the boxes to look open here is what I did...
I started with a piece of plywood (1/2") and screwed a flange to the middle of it. Then I screwed a piece of PVC to that to give the cake stability. Then as I would finish a tier I would cut a hole in the center and "thread" the PVC through the middle of the tier.
Then I doweled the cake.... for instance on the 12x12 I placed three dowels on one side (flush with the cake) and then three on the opposite side about one inch above the cake.
Then when I placed the "lid" on the "box" it was propped open and I "glued" the area that touched the box with royal icing. On top of the open lid I placed a wedge of cake covered in royal icing. Then when the middle tier went on it was level. The process was then repeated with the middle tier.
The baby shoes are made from a 50/50 gum paste fondant mixture and dried for two weeks. I also painted them with luster dust.
The baby blocks on the side of the cake are rice krispie treats covered in fondant.
I hope I didn't forget anything... sorry I'm rushed for time posting this. If you have questions please feel free to ask. :)
Note: I know the pictures are not so great, I forgot my camera and these are taken with my phone. Also, I'm sorry I don't have step by step pictures, I did most of this cake in one night and was super rushed to get it done.
The bottom tier is a 12x12 3 layer cake: Almond/ Vanilla Cake with Cream Cheese Filling (mommy to be's favorite). The "lid" of the gift box is a single layer of cake covered in fondant.
The middle tier is a 9 inch round 3 layer cake: Chocolate Cake with Chocolate Fudge Filling. The "lid" of the gift box is rice krispie treats covered in fondant.
And the top tier is the smallest pan of the Wilton Pillow set. It was pound cake but I did not serve it.
All the fondant is homemade marshmallow fondant and the decorations are 50/50 fondant and gum paste (Satin Ice).
To get the boxes to look open here is what I did...
I started with a piece of plywood (1/2") and screwed a flange to the middle of it. Then I screwed a piece of PVC to that to give the cake stability. Then as I would finish a tier I would cut a hole in the center and "thread" the PVC through the middle of the tier.
Then I doweled the cake.... for instance on the 12x12 I placed three dowels on one side (flush with the cake) and then three on the opposite side about one inch above the cake.
Then when I placed the "lid" on the "box" it was propped open and I "glued" the area that touched the box with royal icing. On top of the open lid I placed a wedge of cake covered in royal icing. Then when the middle tier went on it was level. The process was then repeated with the middle tier.
The baby shoes are made from a 50/50 gum paste fondant mixture and dried for two weeks. I also painted them with luster dust.
The baby blocks on the side of the cake are rice krispie treats covered in fondant.
I hope I didn't forget anything... sorry I'm rushed for time posting this. If you have questions please feel free to ask. :)
Sunday, January 30, 2011
Fireman Helmet Birthday Cake
This was a birthday cake for my brother in law. He has been a member of the volunteer fire department forever and recently graduated from the fire academy and passed is EMT test. We are so proud of him!!
He requested yellow butter cake with peanut butter buttercream filling! It was delicious!!
I used a 9x13 sheet cake for the "brim" of the helmet and three 8" rounds for the top and just carved them down.
I covered the cake with homemade marshmellow fondant and then painted it with powder food coloring. This was my first experience with anything like this and I was presently surprised at how well it turned out. Especially since I worked from a picture of a helmet instead of the real thing.
Happy Birthday Cory!!! We love you and are crazy proud of you!
He requested yellow butter cake with peanut butter buttercream filling! It was delicious!!
I used a 9x13 sheet cake for the "brim" of the helmet and three 8" rounds for the top and just carved them down.
I covered the cake with homemade marshmellow fondant and then painted it with powder food coloring. This was my first experience with anything like this and I was presently surprised at how well it turned out. Especially since I worked from a picture of a helmet instead of the real thing.
Happy Birthday Cory!!! We love you and are crazy proud of you!
Friday, January 28, 2011
Football Birthday Cake
This cake was for a little girl celebrating her 7th birthday with a football themed party. It was adorable! Her mom decorated everything so cute and even made her daughter her very own football pennant!
It was a full sheet cake 18x24 chocolate cake with chocolate buttercream filling..yum!
I then frosted the cake with vanilla buttercream tinted green for the "grass" on the field.
The football was made from rice krispie treats then covered in homemade chocolate marshmellow fondant. The white details are homemade marshmellow fondant.
The yard lines are also homemade marshmellow fondant. The pennant and scoreboard are marshmellow fondant tinted blue. One other note: the time left on the scoreboard is her actual birthday.. 1:29... I give my sweet husband props for coming up with that idea!
I had tons of fun doing this cake and was so excited to be apart of this little girls special day. Happy 7th Birthday Aubree!!
Coming Soon! Another birthday cake!!! Yay!!
It was a full sheet cake 18x24 chocolate cake with chocolate buttercream filling..yum!
I then frosted the cake with vanilla buttercream tinted green for the "grass" on the field.
The football was made from rice krispie treats then covered in homemade chocolate marshmellow fondant. The white details are homemade marshmellow fondant.
The yard lines are also homemade marshmellow fondant. The pennant and scoreboard are marshmellow fondant tinted blue. One other note: the time left on the scoreboard is her actual birthday.. 1:29... I give my sweet husband props for coming up with that idea!
I had tons of fun doing this cake and was so excited to be apart of this little girls special day. Happy 7th Birthday Aubree!!
Coming Soon! Another birthday cake!!! Yay!!
Thursday, January 27, 2011
Daring Bakers Challenge: Biscuit Joconde Imprime/Entremet
The January 2011 Daring Bakers’ challenge was hosted by Astheroshe of the blog
Joconde imprime /entremets. A joconde imprime (French Baking term) is a decorative design baked into a light sponge cake providing an elegant finish to desserts/torts/entremets/ formed in ring molds. A joconde batter is used because it bakes into a moist, flexible cake. The cake batter may be tinted or marbleized for a further decorative effect.
Think Trifle in a mold vs. a glass bowl.
This Joconde/spongecake requires attentive baking so that it remains flexible to easily conform to the molds. If under baked it will stick to the baking mat. It over baked it will dry out and crack. Once cooled, the sponge may be cut into strips to line any shape ring mold.
Entremets (French baking term)- an ornate dessert with many different layers of cake and pastry creams in a mold, usually served cold.
Okay now that I've got you up to speed let me tell you about my experience with this challenge. This is my very first Daring Bakers Challenge and I am very excited to be participating! This challenge was not as difficult as you might first think when reading the recipe. Time consuming...yes. Difficult... not really.
My little masterpiece did not quite turn out as beautiful as I would have liked and I'm going to go ahead and play the toddler card. The day I had set aside to do this challenge I ended up home alone with my 2 year old. Yikes! Baking is more like an Olympic sport when it's just him and I.
The fillings I chose where Wilton's pastry cream recipe and homemade vanilla whipped cream. The whipped cream of course set up very well as expected. The pastry cream however did not set up as nice as I had hoped. I would love to try this again and use different fillings. The presentation on this is breathtaking when done correctly.
Here is the recipe we were given:
For the batter which is applied on top of the pattern
¾ cup/ 180 ml/ 3oz/ 85g almond flour/meal - *You can also use hazelnut flour, just omit the butter
½ cup plus 2 tablespoons/ 150 ml/ 2⅔ oz/ 75g confectioners' (icing) sugar
¼ cup/ 60 ml/ 1 oz/ 25g cake flour *See note below 3 large eggs - about 5⅓ oz/ 150g
3 large egg whites - about 3 oz/ 90g
2½ teaspoons/ 12½ ml/ ⅓ oz/ 10g white granulated sugar or superfine (caster) sugar
2 tablespoons/ 30 ml/ 1oz / 30g unsalted butter, melted
Directions: 1. In a clean mixing bowl whip the egg whites and white granulated sugar to firm, glossy peeks. Reserve in a separate clean bowl to use later.
2. Sift almond flour, confectioner’s sugar, cake flour. (This can be done into your dirty egg white bowl) 3. On medium speed, add the eggs a little at a time. Mix well after each addition. Mix until smooth and light.
4. Fold in one third reserved whipped egg whites to almond mixture to lighten the batter. Fold in remaining whipped egg whites. Do not over mix.
5. Fold in melted butter.
6. Reserve batter to be used later.
This will be for the paste that makes the design:
14 tablespoons/ 210ml/ 7oz/ 200g unsalted butter, softened
1½ cups plus1½ tablespoons/ 385ml/ 7oz/ 200g Confectioners' (icing) sugar
7 large egg whites - about 7 oz / 200g
1¾ cup/ 420ml/ 7¾ oz/ 220g cake flour
Food coloring gel, paste or liquid COCOA Décor Paste Variation: Reduce cake flour to 6 oz / 170g. Add 2 oz/ 60 g cocoa powder. Sift the flour and cocoa powder together before adding to creamed mixture. Directions: 1. Cream butter and sugar until light and fluffy (use stand mixer with blade, hand held mixer, or by hand) 2. Gradually add egg whites. Beat continuously.
3. Fold in sifted flour.
4. Tint batter with coloring to desired color, if not making cocoa variation. Preparing the Joconde- How to make the pattern: 1. Spread a thin even layer of décor paste approximately 1/4 inch (5 millimeter) thick onto silicone baking mat with a spatula, or flat knife. Place mat on an upside down baking sheet. The upside down sheet makes spreading easier with no lip from the pan. 2. Pattern the décor paste – Here is where you can be creative. Make horizontal /vertical lines
Pipe letters, or polka dots, or a piped design. If you do not have a piping bag. Fill a ziplock bag and snip off corner for a homemade version of one.
3. Slide the baking sheet with paste into the freezer. Freeze hard. Approx 15 minutes.
4. Remove from freezer. Quickly pour the Joconde batter over the design. Spread evenly to completely cover the pattern of the Décor paste.
5. Bake at 475ºF /250ºC until the joconde bounces back when slightly pressed, approx. 15 minutes. You can bake it as is on the upside down pan. Yes, it is a very quick bake, so watch carefully.
6. Cool. Do not leave too long, or you will have difficulty removing it from mat. 7.
You may use any mold you like: I chose the ring of my 9" springform pan.
Preparing the Mold:
1. Start with a large piece of parchment paper laid on a very flat baking sheet. Then a large piece of cling wrap over the parchment paper. Place a spring form pan ring, with the base removed, over the cling wrap and pull the cling wrap tightly up on the outside of the mold. Line the inside of the ring with a curled piece of parchment paper overlapping top edge by ½ inch. CUT the parchment paper to the TOP OF THE MOLD. It will be easier to smooth the top of the cake.
2. A biscuit cutter/ cookie cutter- using cling wrap pulled tightly as the base and the cling covering the
3. Cut PVC pipe from your local hardware store. Very cheap! These can be cut into any height you wish to make a mold. 2
to 3 inches is good. My store will cut them for me, ask an employee at your store. You can get several for matching individual desserts. Cling wrap and parchment line, as outlined above.
4. Glass Trifle bowl. You will not have a free standing dessert, but you will have a nice pattern to see your joconde for this layered dessert. Preparing the Jaconde for Molding: Video: MUST WATCH THIS. This is a very good demo of the joconde and filling the entremets:
http://www.youtube.com/watch?v=ca4eLDok-4Q 1. Trim the cake of any dark crispy edges. You should have a nice rectangle shape.
2. Decide how thick you want your "Joconde wrapper".
Traditionally, it is ½ the height of your mold. This is done so more layers of the plated dessert can be shown. However, you can make it the full height.
3. Once your height is measured, then you can cut the cake into equal strips, of height and length. (Use a very sharp paring knife and ruler.) 4. Make sure your strips are cut cleanly and ends are cut perfectly straight. Press the cake strips inside of the mold, decorative side facing out. Once wrapped inside the mold, overlap your ends
5. The mold is done, and ready to fill. slightly. You want your Joconde to fit very tightly pressed up to the sides of the mold. Then gently push and press the ends to meet together to make a seamless cake. The cake is very flexible so you can push it into place. You can use more than one piece to "wrap "your mold, if one cut piece is not long enough. *Note:
If not ready to use. Lay cake kept whole or already cut into strips, on a flat surface, wrap in parchment and several layers of cling wrap and freeze. outside of the mold, placed on a parchment lined very flat baking sheet. Line the inside with a curled piece of parchment paper overlapping. Flip cooled cake on to a powdered sugared parchment paper. Remove silpat. Cake should be right side up, and pattern showing! (The powdered sugar helps the cake from sticking when cutting.) Entremet- Filling Options: It is nice to have a completed dessert so you can unmold and see the Joconde working. Fill with anything you desire. Layers of different flavors and textures! However, it needs to be something cold that will not fall apart when unmolded. Suggestions: Mousses, pastry creams, Bavarian creams, cheesecakes, puddings, curds, jams, cookie bases, more cake
And the finished product: The cake is not sweet itself so you have the option of going with very sweet fillings or not very sweet and keeping a less sweet, refreshing dessert. All in all, I'm aware this is a hot mess, but it was a challenge and that's what I was looking for. I'm sure if I tried again it would be perfect as I know where my mistakes were: pastry cream.
Coming Soon!! More birthday cakes I've been working on!!! AND crafts!!! How to make a diaper cake!!
Loves! Lee Ann
(bake off the remaining sponge and cut to layer inside), nuts, Dacquoise, fresh fruit, chocolates, gelee. (you can use a knife, spatula, cake/pastry comb). Squiggles with your fingers, zig zags, wood grains. Be creative whatever you have at home to make a design can be used. OR use a piping bag. (If using a stand mixer use blade attachment. If hand held a whisk attachment is fine, or by hand. ) accro. She chose to challenge everyone to make a Biscuit Joconde Imprime to wrap around an Entremets dessert.
Joconde imprime /entremets. A joconde imprime (French Baking term) is a decorative design baked into a light sponge cake providing an elegant finish to desserts/torts/entremets/ formed in ring molds. A joconde batter is used because it bakes into a moist, flexible cake. The cake batter may be tinted or marbleized for a further decorative effect.
Think Trifle in a mold vs. a glass bowl.
This Joconde/spongecake requires attentive baking so that it remains flexible to easily conform to the molds. If under baked it will stick to the baking mat. It over baked it will dry out and crack. Once cooled, the sponge may be cut into strips to line any shape ring mold.
Entremets (French baking term)- an ornate dessert with many different layers of cake and pastry creams in a mold, usually served cold.
Okay now that I've got you up to speed let me tell you about my experience with this challenge. This is my very first Daring Bakers Challenge and I am very excited to be participating! This challenge was not as difficult as you might first think when reading the recipe. Time consuming...yes. Difficult... not really.
My little masterpiece did not quite turn out as beautiful as I would have liked and I'm going to go ahead and play the toddler card. The day I had set aside to do this challenge I ended up home alone with my 2 year old. Yikes! Baking is more like an Olympic sport when it's just him and I.
The fillings I chose where Wilton's pastry cream recipe and homemade vanilla whipped cream. The whipped cream of course set up very well as expected. The pastry cream however did not set up as nice as I had hoped. I would love to try this again and use different fillings. The presentation on this is breathtaking when done correctly.
| Here you can see the pattern AND the oozing pastry cream :) |
| Excuse the lighting, it was dark outside at this point |
For the batter which is applied on top of the pattern
¾ cup/ 180 ml/ 3oz/ 85g almond flour/meal - *You can also use hazelnut flour, just omit the butter
½ cup plus 2 tablespoons/ 150 ml/ 2⅔ oz/ 75g confectioners' (icing) sugar
¼ cup/ 60 ml/ 1 oz/ 25g cake flour *See note below 3 large eggs - about 5⅓ oz/ 150g
3 large egg whites - about 3 oz/ 90g
2½ teaspoons/ 12½ ml/ ⅓ oz/ 10g white granulated sugar or superfine (caster) sugar
2 tablespoons/ 30 ml/ 1oz / 30g unsalted butter, melted
| The Almond Flour & Cake Flour I used |
2. Sift almond flour, confectioner’s sugar, cake flour. (This can be done into your dirty egg white bowl) 3. On medium speed, add the eggs a little at a time. Mix well after each addition. Mix until smooth and light.
4. Fold in one third reserved whipped egg whites to almond mixture to lighten the batter. Fold in remaining whipped egg whites. Do not over mix.
5. Fold in melted butter.
6. Reserve batter to be used later.
This will be for the paste that makes the design:
14 tablespoons/ 210ml/ 7oz/ 200g unsalted butter, softened
1½ cups plus1½ tablespoons/ 385ml/ 7oz/ 200g Confectioners' (icing) sugar
7 large egg whites - about 7 oz / 200g
1¾ cup/ 420ml/ 7¾ oz/ 220g cake flour
Food coloring gel, paste or liquid COCOA Décor Paste Variation: Reduce cake flour to 6 oz / 170g. Add 2 oz/ 60 g cocoa powder. Sift the flour and cocoa powder together before adding to creamed mixture. Directions: 1. Cream butter and sugar until light and fluffy (use stand mixer with blade, hand held mixer, or by hand) 2. Gradually add egg whites. Beat continuously.
3. Fold in sifted flour.
| I tinted my batter purple! |
| I chose to pipe on my paste |
Pipe letters, or polka dots, or a piped design. If you do not have a piping bag. Fill a ziplock bag and snip off corner for a homemade version of one.
3. Slide the baking sheet with paste into the freezer. Freeze hard. Approx 15 minutes.
4. Remove from freezer. Quickly pour the Joconde batter over the design. Spread evenly to completely cover the pattern of the Décor paste.
5. Bake at 475ºF /250ºC until the joconde bounces back when slightly pressed, approx. 15 minutes. You can bake it as is on the upside down pan. Yes, it is a very quick bake, so watch carefully.
6. Cool. Do not leave too long, or you will have difficulty removing it from mat. 7.
You may use any mold you like: I chose the ring of my 9" springform pan.
Preparing the Mold:
1. Start with a large piece of parchment paper laid on a very flat baking sheet. Then a large piece of cling wrap over the parchment paper. Place a spring form pan ring, with the base removed, over the cling wrap and pull the cling wrap tightly up on the outside of the mold. Line the inside of the ring with a curled piece of parchment paper overlapping top edge by ½ inch. CUT the parchment paper to the TOP OF THE MOLD. It will be easier to smooth the top of the cake.
2. A biscuit cutter/ cookie cutter- using cling wrap pulled tightly as the base and the cling covering the
3. Cut PVC pipe from your local hardware store. Very cheap! These can be cut into any height you wish to make a mold. 2
to 3 inches is good. My store will cut them for me, ask an employee at your store. You can get several for matching individual desserts. Cling wrap and parchment line, as outlined above.
4. Glass Trifle bowl. You will not have a free standing dessert, but you will have a nice pattern to see your joconde for this layered dessert. Preparing the Jaconde for Molding: Video: MUST WATCH THIS. This is a very good demo of the joconde and filling the entremets:
http://www.youtube.com/watch?v=ca4eLDok-4Q 1. Trim the cake of any dark crispy edges. You should have a nice rectangle shape.
2. Decide how thick you want your "Joconde wrapper".
Traditionally, it is ½ the height of your mold. This is done so more layers of the plated dessert can be shown. However, you can make it the full height.
3. Once your height is measured, then you can cut the cake into equal strips, of height and length. (Use a very sharp paring knife and ruler.) 4. Make sure your strips are cut cleanly and ends are cut perfectly straight. Press the cake strips inside of the mold, decorative side facing out. Once wrapped inside the mold, overlap your ends
5. The mold is done, and ready to fill. slightly. You want your Joconde to fit very tightly pressed up to the sides of the mold. Then gently push and press the ends to meet together to make a seamless cake. The cake is very flexible so you can push it into place. You can use more than one piece to "wrap "your mold, if one cut piece is not long enough. *Note:
If not ready to use. Lay cake kept whole or already cut into strips, on a flat surface, wrap in parchment and several layers of cling wrap and freeze. outside of the mold, placed on a parchment lined very flat baking sheet. Line the inside with a curled piece of parchment paper overlapping. Flip cooled cake on to a powdered sugared parchment paper. Remove silpat. Cake should be right side up, and pattern showing! (The powdered sugar helps the cake from sticking when cutting.) Entremet- Filling Options: It is nice to have a completed dessert so you can unmold and see the Joconde working. Fill with anything you desire. Layers of different flavors and textures! However, it needs to be something cold that will not fall apart when unmolded. Suggestions: Mousses, pastry creams, Bavarian creams, cheesecakes, puddings, curds, jams, cookie bases, more cake
And the finished product: The cake is not sweet itself so you have the option of going with very sweet fillings or not very sweet and keeping a less sweet, refreshing dessert. All in all, I'm aware this is a hot mess, but it was a challenge and that's what I was looking for. I'm sure if I tried again it would be perfect as I know where my mistakes were: pastry cream.
Coming Soon!! More birthday cakes I've been working on!!! AND crafts!!! How to make a diaper cake!!
Loves! Lee Ann
(bake off the remaining sponge and cut to layer inside), nuts, Dacquoise, fresh fruit, chocolates, gelee. (you can use a knife, spatula, cake/pastry comb). Squiggles with your fingers, zig zags, wood grains. Be creative whatever you have at home to make a design can be used. OR use a piping bag. (If using a stand mixer use blade attachment. If hand held a whisk attachment is fine, or by hand. ) accro. She chose to challenge everyone to make a Biscuit Joconde Imprime to wrap around an Entremets dessert.
Wednesday, January 19, 2011
Toy Story Birthday Cake
Hello everyone,
I am finally back! The holidays were completely hectic and rushed and after that...well, I won't bore you with the details. I've missed blogging everyday and hopefully my schedule will let me resume on a regular basis.
My most recent accomplishment was my sons 2nd birthday cake: Toy Story Theme!
Here it is in my kitchen before we left for the Jumpy Place.
Tier sizes: 10" round, 8" round, and half of the Wilton Sports Ball pan.
The bottom tier was almond/vanilla cake with my usual Vanilla Frosting(Vegan). The bottom tier was then covered in homemade marshmellow fondant that was tinted light brown with Wilton coloring. The "fence" on the cake was Chocolate Marshmellow Fondant.
The middle tier was Chocolate Cake (Chef Chloe's Recipe) with a Chocolate Fudge Filling (Vegan) and a Chocolate Frosting. Then the middle tier was covered in Marshmellow Fondant tinted Sky Blue (Wilton Coloring).
The top tier I have to confess was a slight problem... I originally wanted to use a blue velvet recipe that I had found. However, I did not pay attention to the warning on the cake pan box which said "use a dense heavy cake". Well, turns out they do know what they are talking about. When I started to trim the layer it completely fell apart.
I then decided to make the top tier out of rice krispie treats (I actually used generic Fruity Pebbles since that is what I had) that way there would be no worries about stability. I mixed up a regular batch of RKT (sub Fruity Pebbles) and mashed it into half of the ball pan. I stuck it in the fridge for a few hours then left it on the table overnight to harden.
The next morning that "moon half" was hard as a rock. I applied a thin layer of frosting and then covered it in Marshmellow Fondant tinted gray. (Very very little Americolor Black and a smidgen of Wilton's Delphinium Blue).
The name is done with leftover Marshmellow Fondant and the characters are toys I purchased at the store. The yellow stars are fondant as well that I cut out, let dry over night and inserted wire in them. (Note: the stars should have had more time to dry.)
Looking back there are a few mistakes in the fondant, but I figure I will get better with practice (this is only my second fondant cake). But I was completely thrilled to give my little boy something that he loved!
I am finally back! The holidays were completely hectic and rushed and after that...well, I won't bore you with the details. I've missed blogging everyday and hopefully my schedule will let me resume on a regular basis.
My most recent accomplishment was my sons 2nd birthday cake: Toy Story Theme!
Tier sizes: 10" round, 8" round, and half of the Wilton Sports Ball pan.
The bottom tier was almond/vanilla cake with my usual Vanilla Frosting(Vegan). The bottom tier was then covered in homemade marshmellow fondant that was tinted light brown with Wilton coloring. The "fence" on the cake was Chocolate Marshmellow Fondant.
The middle tier was Chocolate Cake (Chef Chloe's Recipe) with a Chocolate Fudge Filling (Vegan) and a Chocolate Frosting. Then the middle tier was covered in Marshmellow Fondant tinted Sky Blue (Wilton Coloring).
The top tier I have to confess was a slight problem... I originally wanted to use a blue velvet recipe that I had found. However, I did not pay attention to the warning on the cake pan box which said "use a dense heavy cake". Well, turns out they do know what they are talking about. When I started to trim the layer it completely fell apart.
I then decided to make the top tier out of rice krispie treats (I actually used generic Fruity Pebbles since that is what I had) that way there would be no worries about stability. I mixed up a regular batch of RKT (sub Fruity Pebbles) and mashed it into half of the ball pan. I stuck it in the fridge for a few hours then left it on the table overnight to harden.
The next morning that "moon half" was hard as a rock. I applied a thin layer of frosting and then covered it in Marshmellow Fondant tinted gray. (Very very little Americolor Black and a smidgen of Wilton's Delphinium Blue).
The name is done with leftover Marshmellow Fondant and the characters are toys I purchased at the store. The yellow stars are fondant as well that I cut out, let dry over night and inserted wire in them. (Note: the stars should have had more time to dry.)
Looking back there are a few mistakes in the fondant, but I figure I will get better with practice (this is only my second fondant cake). But I was completely thrilled to give my little boy something that he loved!
Subscribe to:
Posts (Atom)


