This is Tanee. She is my soon to be sister in law! (I'm so happy about that by the way!) She is so amazingly sweet and I love her to death.
My brother in law, Cory had a Crawfish Boil for her birthday and I made her cake... her it is!
The cake was strawberry with strawberry buttercream, chocolate with chocolate fudge filling, italian cream cake with cream cheese filling, and blueberry lemon with lemon buttercream filling! Whew!
A lot of flavors I know, but I like to have a variety when I do a large cake for a small group.. more cake gets eaten that way.
Aren't they the cutest crawfish ever!?! My favorite is their wiskers!
Sunday, March 27, 2011
Monday, March 14, 2011
The Easiest Fruit Dip Ever!
This recipe has been in my family since I was a little girl. I don't remember who gave it to my mother but I do remember when we had our very first taste of this incredible dip. My first bite of dip was slathered on a fruit and nut filled bagel. Now I serve this dip with fresh fruit, mainly strawberries but grapes work great too.
This recipe is great to entertain with... just mix it up a day in advance throw it in the fridge and then let it sit out a few hours before serving to soften. Everyone goes crazy over this stuff!!
Here is the simplest recipe I ever!
Fruit Dip
1 pkg. cream cheese, softened
1 jar marshmallow creme (or marshmallow fluff, whatever you call it)
Throw both in a bowl and mix with a hand mixer, you could use a stand mixer too. And that is it! Viola! The easiest fruit dip ever!
I highly suggest making at least two batches.. people go nuts over this stuff.
This recipe is great to entertain with... just mix it up a day in advance throw it in the fridge and then let it sit out a few hours before serving to soften. Everyone goes crazy over this stuff!!
Here is the simplest recipe I ever!
Fruit Dip
1 pkg. cream cheese, softened
1 jar marshmallow creme (or marshmallow fluff, whatever you call it)
Throw both in a bowl and mix with a hand mixer, you could use a stand mixer too. And that is it! Viola! The easiest fruit dip ever!
I highly suggest making at least two batches.. people go nuts over this stuff.
Saturday, March 12, 2011
Strawberry Muffins (Eggless)
Sweets for a Saturday #8- Strawberry Muffins (Eggless)
I had a package of thawed strawberries in the fridge from a recent strawberry cake I had made and decided to put them to good use. I already had strawberry cupcakes in the freezer and wanted something with a little more healthy snack vibe for the little tornado aka my two year old son. Soooo... I whipped up his little recipe by looking at a few recipes online and inventing my own. This recipe has no eggs so it's great for those with allergies (like my little guy) or if you just happen to be out of eggs. These muffins are perfect for breakfast or snack (or dessert as my husband ate them). They are just sweet enough without being a cupcake and make you feel it's okay to eat more than one... hey there's whole wheat flour in them...that makes it okay right?
Start by whisking the all purpose flour, whole wheat flour, sugar, baking powder, baking soda, salt, and cinnamon together.
In a separate bowl, whisk together the strawberry puree, buttermilk, oil, yogurt and vanilla.
Dump the dry ingredients into the wet (no need for splitting it up into batches...just dump it) and whisk to combine.
Divide batter into prepared muffin tins... I made both mini and standard size muffins.
And back at 375 degrees... minis 5-7 minutes. standard 14-17 minutes...keep and eye on these... they are suppose to be super moist so you don't want to over bake them. When a toothpick comes out clean they are done!
Strawberry Muffins
1 cup strawberry puree
1/3 cup plus 3 tbsp. sugar
1 1/4 cup all purpose flour
1/2 cup whole wheat flour
2 tsp. baking powder
1/2 tsp. baking soda
1/2 tsp. cinnamon
1 cup low fat buttermilk
1/4 cup canola oil
1/4 cup low fat vanilla yogurt (you can add 1 egg if you prefer)
1 tsp. vanilla
Combine all purpose flour, whole wheat flour, sugar, baking powder, baking soda, salt, and cinnamon; whisk to combine.
In a separate bowl, whisk together the strawberry puree, buttermilk, oil, yogurt and vanilla.
Mix the dry ingredients into the wet and divide into prepared muffin tins. Bake at 375 degrees until a toothpick inserted into the middle of the muffin comes out clean.
Mini: 5-7 minutes Standard: 14-17 minutes
Allow to cool a few minutes in muffin tins and turn out to cool completely on a wire rack.
Yield: Approximately 12 to 14 standard muffins
Coming Soon! Party planning tips, recipes, tricks and treats!
Click on the button above to check out a lot of other goodies!
Start by whisking the all purpose flour, whole wheat flour, sugar, baking powder, baking soda, salt, and cinnamon together.
In a separate bowl, whisk together the strawberry puree, buttermilk, oil, yogurt and vanilla.
Dump the dry ingredients into the wet (no need for splitting it up into batches...just dump it) and whisk to combine.
Divide batter into prepared muffin tins... I made both mini and standard size muffins.
And back at 375 degrees... minis 5-7 minutes. standard 14-17 minutes...keep and eye on these... they are suppose to be super moist so you don't want to over bake them. When a toothpick comes out clean they are done!
Strawberry Muffins
1 cup strawberry puree
1/3 cup plus 3 tbsp. sugar
1 1/4 cup all purpose flour
1/2 cup whole wheat flour
2 tsp. baking powder
1/2 tsp. baking soda
1/2 tsp. cinnamon
1 cup low fat buttermilk
1/4 cup canola oil
1/4 cup low fat vanilla yogurt (you can add 1 egg if you prefer)
1 tsp. vanilla
Combine all purpose flour, whole wheat flour, sugar, baking powder, baking soda, salt, and cinnamon; whisk to combine.
In a separate bowl, whisk together the strawberry puree, buttermilk, oil, yogurt and vanilla.
Mix the dry ingredients into the wet and divide into prepared muffin tins. Bake at 375 degrees until a toothpick inserted into the middle of the muffin comes out clean.
Mini: 5-7 minutes Standard: 14-17 minutes
Allow to cool a few minutes in muffin tins and turn out to cool completely on a wire rack.
Yield: Approximately 12 to 14 standard muffins
Coming Soon! Party planning tips, recipes, tricks and treats!
Thursday, March 10, 2011
Tracy's Baby Carriage Theme Shower
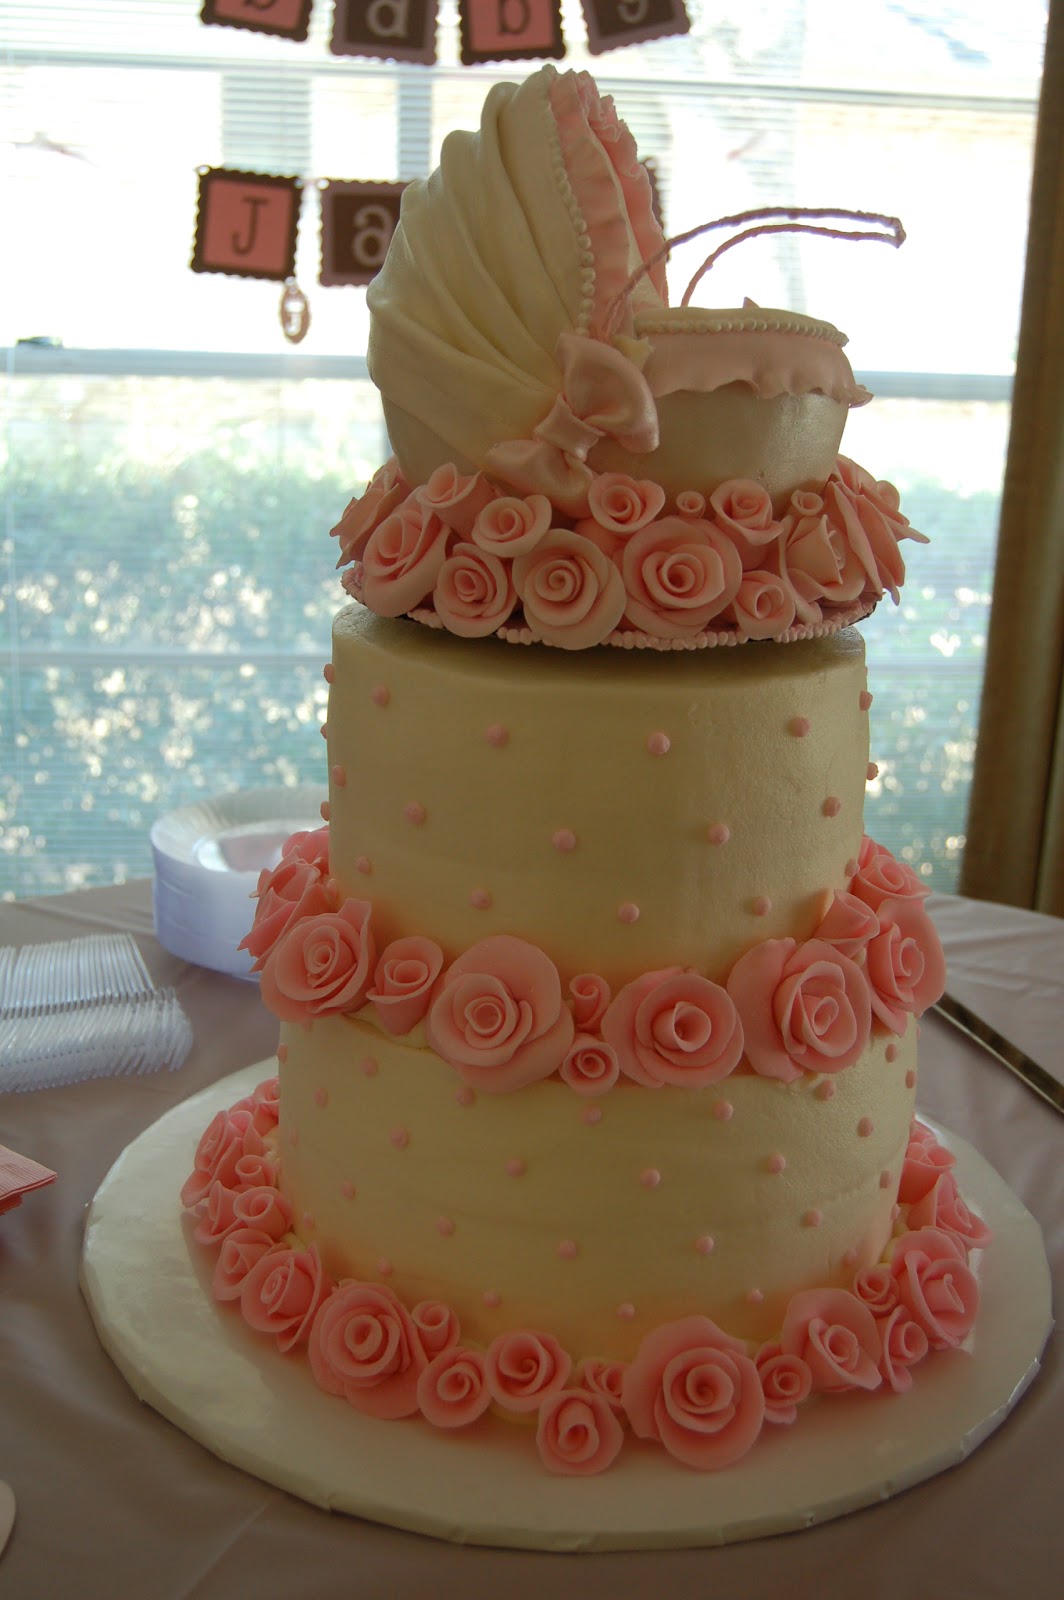
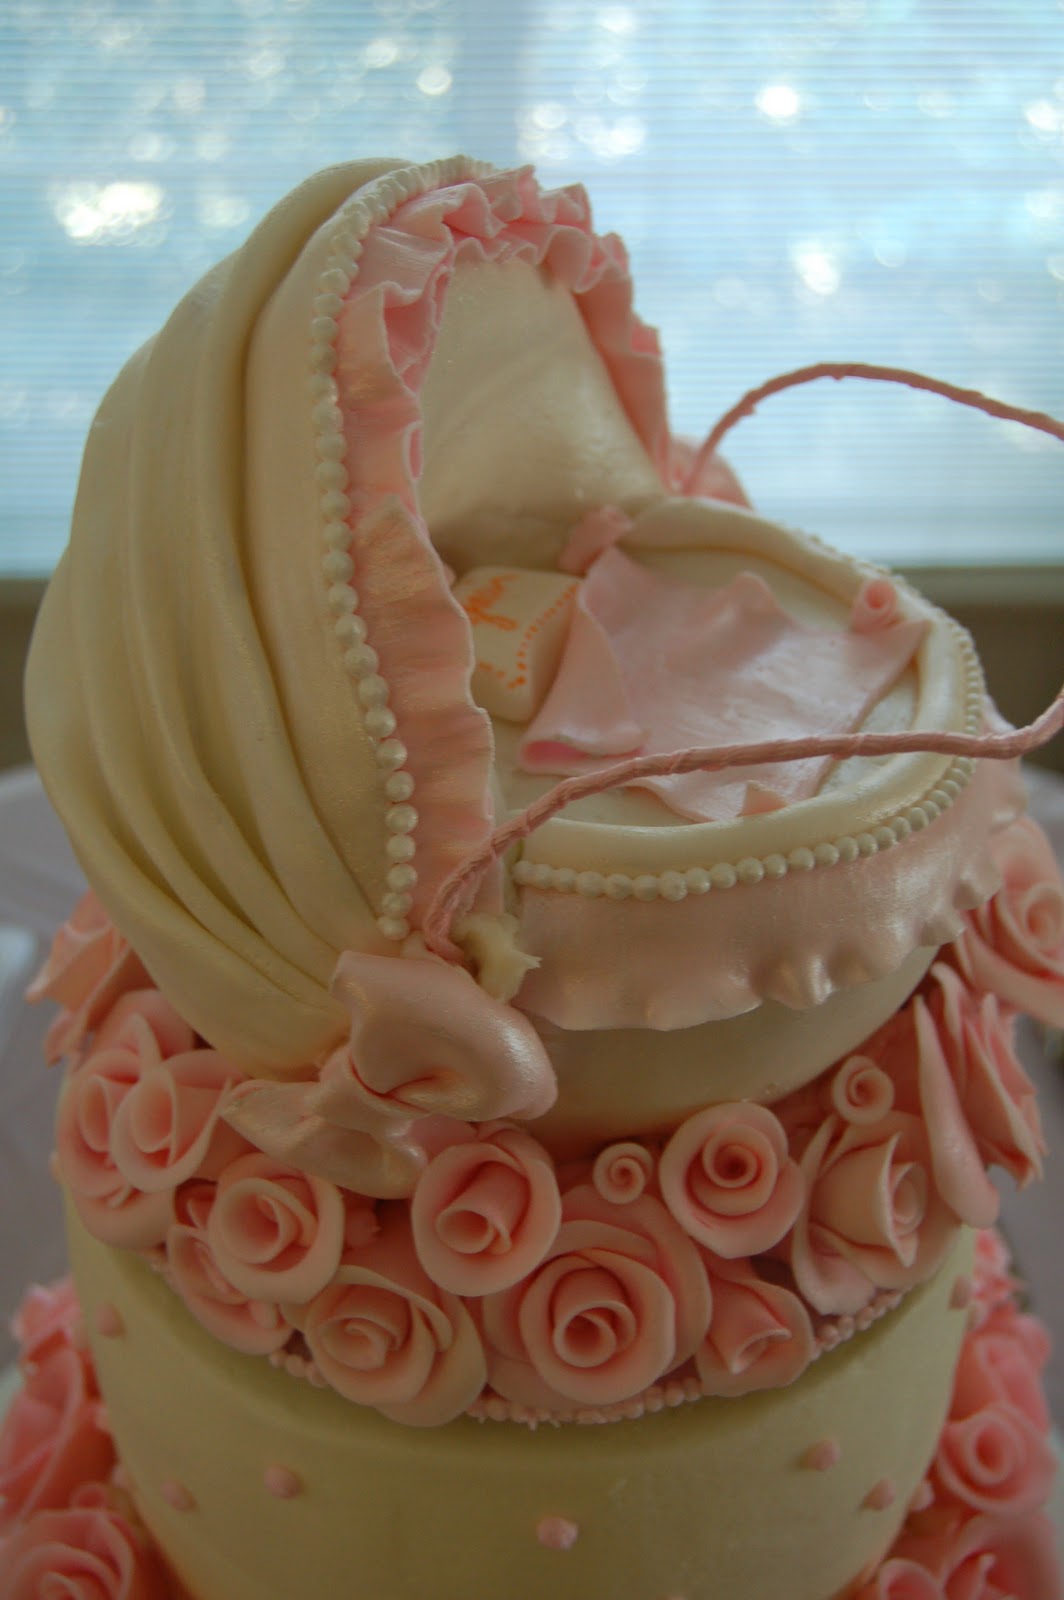
This was the family baby shower for my sister in law Tracy. The theme was baby carriage and of course PINK! I love it! Here is the cake I made...
The tier sizes are 10" and 8" rounds. The topper was made by using the Wilton ball pan.
The bottom tier was two layers of almond-vanilla cake with cream cheese filling and two layers of chocolate cake with chocolate fudge filling.
The middle tier was two layers of blueberry lemon cake with lemon buttercream filling and two layers of strawberry cake with strawberry buttercream.
The top tier was made from rice krispie treats molded into the Wilton ball pan with one of the halves cut in half. I then covered it in modeling chocolate to get a smooth finish and then covered that in marshmellow fondant. The pink details are made from 50/50 pink marshmellow fondant and gumpaste. The roses were made of the 50/50 mixture as well.
The rest of the shower details.....
| The food table |
| Fresh strawberries and fruit dip (I will be posting this recipe soon) |
| Banana Nut Muffins |
| Punch cups rimmed in pink sugar |
| Straw flags I made |
Coming soon! I will be sharing entertaining tips, tricks, secrets and recipes!
Monday, February 28, 2011
Modeling Chocolate
I have been trying to expand my knowledge of cake decorating lately and wanted to share one of the recipes that I use all the time.
I use this modeling chocolate to sculpt items for cakes. Why modeling chocolate over fondant or gumpaste. I actually use all three all the time but each has it's own benefits.
Fondant: rolls out smooth, it tastes great ( I use a homemade Marshmallow Fondant recipe), I use this for covering cakes and I mix fondant 50/50 with Gumpaste for decorations.
Gumpaste: I rarely use it alone as it dries extremely fast and will crack, I use Gumpaste 50/50 with Fondant for flowers, bows, and other decorations.
Modeling Chocolate: I love that with modeling chocolate you can smooth out your seams (this is much more difficult with fondant) and you can also sculpt with it more like clay rather than using fondant.
Here is the recipe I use:
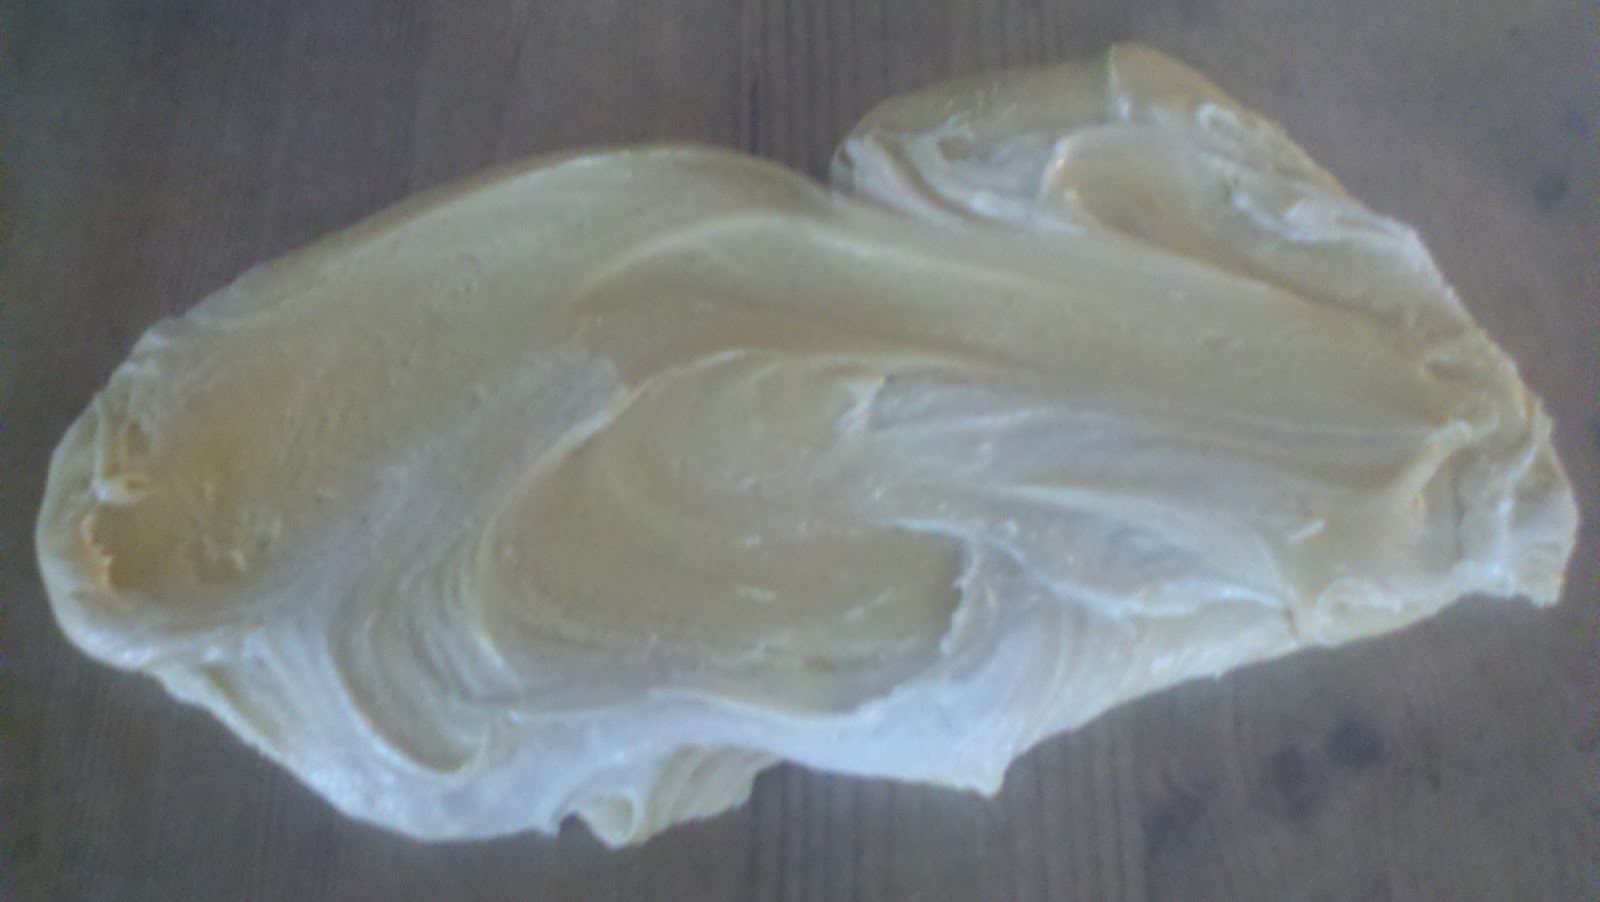
Modeling Chocolate
10 oz. Chocolate melting disks (the ones that come in different colors I buy mine at Hobby Lobby)
1/3 cup corn syrup
Melt the chocolate in a microwave safe bowl.
Use 30 second intervals and stir after each until chocolate is smooth. When chocolate has a few small pieces left that are not melted, simply stir to melt those rather than returning to the microwave. Once chocolate is melted and smooth add the corn syrup and mix well.
Then pour chocolate/corn syrup mixture out onto wax paper.
Place another sheet of wax paper on top of the chocolate and press to smooth out in an even layer (1/4"-1/2"). Let modeling chocolate cool overnight and it's ready to use. To store I just put the modeling chocolate in a Ziploc bag and store at room temperature. I usually will use it within a week or so.
A tip: You can even cover a cake with this instead of fondant. I have not tried this yet but I'm thinking about it.
Coming Soon: Another Baby shower Cake this coming weekend!! I will also be sharing all the crafts I made for the baby shower as well!!
I use this modeling chocolate to sculpt items for cakes. Why modeling chocolate over fondant or gumpaste. I actually use all three all the time but each has it's own benefits.
Fondant: rolls out smooth, it tastes great ( I use a homemade Marshmallow Fondant recipe), I use this for covering cakes and I mix fondant 50/50 with Gumpaste for decorations.
Gumpaste: I rarely use it alone as it dries extremely fast and will crack, I use Gumpaste 50/50 with Fondant for flowers, bows, and other decorations.
Modeling Chocolate: I love that with modeling chocolate you can smooth out your seams (this is much more difficult with fondant) and you can also sculpt with it more like clay rather than using fondant.
Here is the recipe I use:
Modeling Chocolate
10 oz. Chocolate melting disks (the ones that come in different colors I buy mine at Hobby Lobby)
1/3 cup corn syrup
Melt the chocolate in a microwave safe bowl.
Use 30 second intervals and stir after each until chocolate is smooth. When chocolate has a few small pieces left that are not melted, simply stir to melt those rather than returning to the microwave. Once chocolate is melted and smooth add the corn syrup and mix well.
Then pour chocolate/corn syrup mixture out onto wax paper.
Place another sheet of wax paper on top of the chocolate and press to smooth out in an even layer (1/4"-1/2"). Let modeling chocolate cool overnight and it's ready to use. To store I just put the modeling chocolate in a Ziploc bag and store at room temperature. I usually will use it within a week or so.
A tip: You can even cover a cake with this instead of fondant. I have not tried this yet but I'm thinking about it.
Coming Soon: Another Baby shower Cake this coming weekend!! I will also be sharing all the crafts I made for the baby shower as well!!
Sunday, February 27, 2011
Panna Cotta & Florentine Cookies
Hello Everyone! Whew! I've been super busy and first I want to tell all my blogging friends that I'm sorry I haven't been commenting... your posts have all been amazing and I am reading them, it's just usually at 9:00 at night on my phone :)
The February 2011 Daring Bakers’ challenge was hosted by Mallory from A Sofa in the Kitchen. She chose to challenge everyone to make Panna Cotta from a Giada De Laurentiis recipe and Nestle Florentine Cookies.
I have been wanting to try making Panna Cotta for several years now since watching The Barefoot Contessa make it on her show. Surprisingly it was not difficult at all! Panna Cotta is a very pudding like dessert without the sweetness. In my opinion it could have been much sweeter but it was good. I did add one vanilla bean scraped to the recipe. The Florentine Cookies were amazing... with or without the chocolate. I actually preferred them without.
Here is all the info... sorry about the lighting, it's a dreary day here with no sunshine.
1 tablespoon (one packet) (15 ml) (7 gm) (¼ oz) unflavored powdered gelatin
3 cups (720 ml) whipping cream (30+% butterfat)
1/3 cup (80 ml) honey
1 tablespoon (15 ml) (15 gm) (½ oz) granulated sugar
pinch of salt
Directions: 1. Pour the milk into a bowl or pot and sprinkle gelatin evenly and thinly over the milk (make sure the bowl/pot is cold by placing the bowl/pot in the refrigerator for a few minutes before you start making the Panna Cotta). Let stand for 5 minutes to soften the gelatin.
2. Pour the milk into the saucepan/pot and place over medium heat on the stove. Heat this mixture until it is hot, but not boiling, about five minutes. (I whisk it a few times at this stage).
3. Next, add the cream, honey, sugar, and pinch of salt. Making sure the mixture doesn't boil, continue to heat and stir occasionally until the sugar and honey have dissolved 5-7 minutes.
4. Remove from heat, allow it to sit for a few minutes to cool slightly. Then pour into the glass or ramekin.
5. Refrigerate at least 6 hours or overnight. Add garnishes and serve. Hope you love it!
Florentine Cookies
Ingredients:
1 cup (240 ml) (230 gm) (8 oz) granulated sugar
2/3 cup (160 ml) (95 gm) (3
1/4 cup (60 ml) dark corn syrup
1/4 cup (60 ml) whole milk
1 tsp (5 ml) vanilla extract
pinch of salt
1½ cups (360 ml) (250 gm) (9 oz) dark or milk chocolate 2/3 cup (160 ml) (150 gm) (5.3 oz) unsalted butter 2 cups (480 ml) (160 gm) (5 2/3 oz) quick oats ⅓ oz) plain (all purpose) flour Directions:
1. Melt butter in a medium saucepan, then remove from the heat.
2. To the melted butter add oats, sugar, flour, corn syrup, milk, vanilla, and salt. Mix well. Drop a tablespoon full, three inches (75 mm) apart, onto your prepared baking sheet. Flatten slightly with the back of your tablespoon, or use a spatula.
3. Bake in preheated oven for 6-8 minutes, until cookies are golden brown. Cool completely on the baking sheets.
4. While the cookies are cooling melt your chocolate until smooth either in the microwave (1 1/2 minutes), or stove top (in a double boiler, or a bowl that fits atop a saucepan filled with a bit of water, being sure the water doesn't touch the bottom of the bowl).
5. Peel the cookies from the silpat or parchment and place face down on a wire rack set over a sheet of wax/parchment paper (to keep counters clean).
6. Spread a tablespoon of chocolate on the bottom/flat side of your cookie, sandwiching another (flat end) cookie atop the chocolate.
Preheat oven to moderately hot 375°F (190°C) (gas mark 5). Prepare your baking sheet with silpat or parchment paper.
The February 2011 Daring Bakers’ challenge was hosted by Mallory from A Sofa in the Kitchen. She chose to challenge everyone to make Panna Cotta from a Giada De Laurentiis recipe and Nestle Florentine Cookies.
I have been wanting to try making Panna Cotta for several years now since watching The Barefoot Contessa make it on her show. Surprisingly it was not difficult at all! Panna Cotta is a very pudding like dessert without the sweetness. In my opinion it could have been much sweeter but it was good. I did add one vanilla bean scraped to the recipe. The Florentine Cookies were amazing... with or without the chocolate. I actually preferred them without.
Here is all the info... sorry about the lighting, it's a dreary day here with no sunshine.
Panna Cotta
Ingredients 1 cup (240 ml) whole milk 1 tablespoon (one packet) (15 ml) (7 gm) (¼ oz) unflavored powdered gelatin
3 cups (720 ml) whipping cream (30+% butterfat)
1/3 cup (80 ml) honey
1 tablespoon (15 ml) (15 gm) (½ oz) granulated sugar
pinch of salt
Directions: 1. Pour the milk into a bowl or pot and sprinkle gelatin evenly and thinly over the milk (make sure the bowl/pot is cold by placing the bowl/pot in the refrigerator for a few minutes before you start making the Panna Cotta). Let stand for 5 minutes to soften the gelatin.
2. Pour the milk into the saucepan/pot and place over medium heat on the stove. Heat this mixture until it is hot, but not boiling, about five minutes. (I whisk it a few times at this stage).
3. Next, add the cream, honey, sugar, and pinch of salt. Making sure the mixture doesn't boil, continue to heat and stir occasionally until the sugar and honey have dissolved 5-7 minutes.
4. Remove from heat, allow it to sit for a few minutes to cool slightly. Then pour into the glass or ramekin.
5. Refrigerate at least 6 hours or overnight. Add garnishes and serve. Hope you love it!
Florentine Cookies
Ingredients:
1 cup (240 ml) (230 gm) (8 oz) granulated sugar
2/3 cup (160 ml) (95 gm) (3
1/4 cup (60 ml) dark corn syrup
1/4 cup (60 ml) whole milk
1 tsp (5 ml) vanilla extract
pinch of salt
1½ cups (360 ml) (250 gm) (9 oz) dark or milk chocolate 2/3 cup (160 ml) (150 gm) (5.3 oz) unsalted butter 2 cups (480 ml) (160 gm) (5 2/3 oz) quick oats ⅓ oz) plain (all purpose) flour Directions:
1. Melt butter in a medium saucepan, then remove from the heat.
2. To the melted butter add oats, sugar, flour, corn syrup, milk, vanilla, and salt. Mix well. Drop a tablespoon full, three inches (75 mm) apart, onto your prepared baking sheet. Flatten slightly with the back of your tablespoon, or use a spatula.
3. Bake in preheated oven for 6-8 minutes, until cookies are golden brown. Cool completely on the baking sheets.
4. While the cookies are cooling melt your chocolate until smooth either in the microwave (1 1/2 minutes), or stove top (in a double boiler, or a bowl that fits atop a saucepan filled with a bit of water, being sure the water doesn't touch the bottom of the bowl).
5. Peel the cookies from the silpat or parchment and place face down on a wire rack set over a sheet of wax/parchment paper (to keep counters clean).
6. Spread a tablespoon of chocolate on the bottom/flat side of your cookie, sandwiching another (flat end) cookie atop the chocolate.
Wednesday, February 16, 2011
Baby Shower "Gifts" Cake
This cake I made for my sister in law's very first baby shower. As you can see she is having a little girl and everyone is just ecstatic!
Note: I know the pictures are not so great, I forgot my camera and these are taken with my phone. Also, I'm sorry I don't have step by step pictures, I did most of this cake in one night and was super rushed to get it done.
The bottom tier is a 12x12 3 layer cake: Almond/ Vanilla Cake with Cream Cheese Filling (mommy to be's favorite). The "lid" of the gift box is a single layer of cake covered in fondant.
The middle tier is a 9 inch round 3 layer cake: Chocolate Cake with Chocolate Fudge Filling. The "lid" of the gift box is rice krispie treats covered in fondant.
And the top tier is the smallest pan of the Wilton Pillow set. It was pound cake but I did not serve it.
All the fondant is homemade marshmallow fondant and the decorations are 50/50 fondant and gum paste (Satin Ice).
To get the boxes to look open here is what I did...
I started with a piece of plywood (1/2") and screwed a flange to the middle of it. Then I screwed a piece of PVC to that to give the cake stability. Then as I would finish a tier I would cut a hole in the center and "thread" the PVC through the middle of the tier.
Then I doweled the cake.... for instance on the 12x12 I placed three dowels on one side (flush with the cake) and then three on the opposite side about one inch above the cake.
Then when I placed the "lid" on the "box" it was propped open and I "glued" the area that touched the box with royal icing. On top of the open lid I placed a wedge of cake covered in royal icing. Then when the middle tier went on it was level. The process was then repeated with the middle tier.
The baby shoes are made from a 50/50 gum paste fondant mixture and dried for two weeks. I also painted them with luster dust.
The baby blocks on the side of the cake are rice krispie treats covered in fondant.
I hope I didn't forget anything... sorry I'm rushed for time posting this. If you have questions please feel free to ask. :)
Note: I know the pictures are not so great, I forgot my camera and these are taken with my phone. Also, I'm sorry I don't have step by step pictures, I did most of this cake in one night and was super rushed to get it done.
The bottom tier is a 12x12 3 layer cake: Almond/ Vanilla Cake with Cream Cheese Filling (mommy to be's favorite). The "lid" of the gift box is a single layer of cake covered in fondant.
The middle tier is a 9 inch round 3 layer cake: Chocolate Cake with Chocolate Fudge Filling. The "lid" of the gift box is rice krispie treats covered in fondant.
And the top tier is the smallest pan of the Wilton Pillow set. It was pound cake but I did not serve it.
All the fondant is homemade marshmallow fondant and the decorations are 50/50 fondant and gum paste (Satin Ice).
To get the boxes to look open here is what I did...
I started with a piece of plywood (1/2") and screwed a flange to the middle of it. Then I screwed a piece of PVC to that to give the cake stability. Then as I would finish a tier I would cut a hole in the center and "thread" the PVC through the middle of the tier.
Then I doweled the cake.... for instance on the 12x12 I placed three dowels on one side (flush with the cake) and then three on the opposite side about one inch above the cake.
Then when I placed the "lid" on the "box" it was propped open and I "glued" the area that touched the box with royal icing. On top of the open lid I placed a wedge of cake covered in royal icing. Then when the middle tier went on it was level. The process was then repeated with the middle tier.
The baby shoes are made from a 50/50 gum paste fondant mixture and dried for two weeks. I also painted them with luster dust.
The baby blocks on the side of the cake are rice krispie treats covered in fondant.
I hope I didn't forget anything... sorry I'm rushed for time posting this. If you have questions please feel free to ask. :)
Subscribe to:
Posts (Atom)