Monday, October 18, 2010

Double Vanilla Biscotti


I have been looking for recipes to use my vanilla beans and found this recipe in the 12 weeks of Christmas Cookies that I am participating in.


First of all, I had never tried to make Biscotti before.  Sure I've had a sample here and there but whoa mama...these take the cake..or should I say cookie.  They exceeded my expectations completely.  Give them a go...they are Divine!


Click here to get this fabulous recipe for Double Vanilla Biscotti. 

Sourdough Gingerbread: The Sourdough Project

The Sourdough Project:

I started a new adventure a few days ago... a sourdough starter. 
It was quite easy to start and was ready to use on the second day which I thought was fast.  My hopes are to use the starter in a lot of holiday baking this season. 

My very first sourdough recipe to make was Sourdough Gingerbread.  If you are like me you never new that gingerbread could be made with sourdough.(Confession: I had never even made regular gingerbread)  It sounded somewhat strange but I went for it anyway and it was delicious!  I gave the majority of it to some of my in laws (who are gingerbread conniseurs) and they raved over it!  Success on my first sourdough project experience!


Sourdough Gingerbread

1/2 cup firmly packed brown sugar
1/2 cup shortening
1/2 cup molasses
EnerG egg replacer equivilant to 1 egg (or just use 1 egg)
1 1/2 cups unbleached flour
1 teaspoon baking soda
1/2 teaspoon salt
1 teaspoon ground ginger
1 teaspoon cinnamon
1/2 cup hot water
1 cup active sourdough starter


Cream brown sugar and shortening and beat. Then add molasses and egg replacer or egg, beating continuously.

Sift dry ingredients together and blend into hot water. Beat this mixture into creamed mixture. Add the sourdough starter slowly, mixing carefully to maintain a bubbly batter. Bake in pan at 375 degrees F for about 30 minutes or until done.
*I used an 8x8 square cake pan*


Starter:

2 cups all purpose flour
2 tsp. sugar
1 pkg. (2 1/4 tsp.) yeast
2 cups warm water (105-115 degrees)

In a glass bowl, combine the flour, sugar, and yeast.  Then slowly add the water while stirring.


A lot of people make this confusing... I'm going to keep it simple.

The Basics:  After making the starter, cover it with a dish towel and leave it on your kitchen counter.  It does best in temperatures of 70-80 degrees... 100 degrees will kill the yeast apprently. 

You will stir the starter once a day... the starter will be ready anywhere from day 2 to day 5. (Mine was ready on day 2)  You will know this when it bubbles up and smells slightly sour.  At this time your starter is officially ready to use in baking.

From here on out you will do the following....
If you would like to keep it on the kitchen counter:  Every day you will stir the starter and remove 1 cup of the mixture (use it, give it away, or throw it away). Then replace it with 1 cup of warm water and 1 cup of flour.

If you would like to keep in the refrigerator:  You will do the same as above but every other week instead of everyday.  This is a better option for those that only want to bake every once in a while. 

*If the starter is in the fridge, bring it to room temperature before using.  And I've read that if your water contains chlorine or you have a water softener you should use bottled water... not sure on this.. I have well water.

More recipes to come from the Sourdough Project!

Friday, October 15, 2010

Noel Nut Balls- Week 3 of the Twelve Weeks of Christmas Cookies

Twelve Weeks of Christmas Cookies- Week 3


Every holiday season a few people on my gift list receive Christmas gift baskets. Each year I try to change the goodies up a bit but this cookie is always included.  Not only do I happen to love them but they are extremely easy to make, they make a very large batch(depending on the size of the cookie), and a big pile of them on a dessert platter is stunning for a holiday party.  During the holidays I will usually double the batch just because I find myself eating one everytime I walk through the kitchen. 

 Week 3- Noel Nut Balls


Noel Nut Balls

2 sticks unsalted butter, softened
2 tbsp. honey
1 tsp.-1 tbsp. bourbon (your choice)
2 1/4 cups flour
3/4 c. chopped pecans
1/2 c. sifted powdered sugar
1/4 tsp. salt


Cream together butter and honey until fluffy. 
Add bourbon.  In a separate bowl, whisk together the flour, pecans, powdered sugar, and salt. 


Add the dry ingredients to the butter mixture and beat to combine. 


Wrap dough in plastic wrap and refrigerate for 3 hours. 


Preheat oven to 350 degrees.  Line a baking sheet with parchment.  Roll the dough into small balls (I use a small cookie scoop).  Bake approximately 12 to 13 minutes.  Cool completely and roll in powdered sugar.


Thursday, October 14, 2010

Homemade Vanilla Extract

I have always wanted to try recipes using vanilla beans, but the fact is they are so expensive I couldn't see experimenting with them.  I found on eBay that I can order a pound of vanilla beans for a total of around $30! I was super excited and placed my order immediately!  My first recipe to try:


Homemade Vanilla Extract

This is a process so I will be posting updated photos every week.

You will need:
A clean jar
1 cup vodka
3 vanilla beans


Process:
Place the jar in the kitchen sink and pour boiling water in to the jar.  Let it sit for a few minutes to sterilize the inside of the jar.  Carefully pour the hot water out. 


Using a knife, slice the vanilla beans length wise and if the jar is very short cut them in half as well.  Then place the beans in the jar.  Pour the vodka over the beans and screw the lid on tight.  I give the jar a little shake.  Place the jar in a cool, dark place (like the back of your pantry) for 8 weeks, giving the jar a shake once a week.  The longer it sits the darker the extract will get. 

* When you use about 20% of the extract, replace the vodka back to the original level.  As you use vanilla beans in other recipes place the used beans in the extract jar, removing old beans if the jar gets too crowded.  This way you'll never run out!


More photos to come!!

Wednesday, October 13, 2010

Pumpkin Spice Waffles & Apple Cinnamon Pancakes

It's time to re-stock my waffle and pancake freezer stash again.  Every few weeks I take a day and make a couple batches of each for a quick breakfast in the morning.  ( My dear son would never let me actually cook breakfast in the morning without having a complete meltdown from starvation...yeah, he's not even 2 yet)  This time I was inspired by our recent 3 days of temperatures not in the high 90's and decided to do something "fall-ish".  Enter Pumpkin Spice Waffles and Apple Cinnamon Pancakes.


Now, you will notice that both recipes are vegan...but I ask those who have never gone "there" to give it a try.  My son was diagnosed with an egg allergy a few months ago and since I've been baking and cooking without eggs and more often when it comes to desserts, completely vegan.  Most people can't even tell the difference or they think the vegan dessert is better. 


Pumpkin Spice Waffles

2 1/2 cups flour
1/3 cup brown sugar
2 1/2 teaspoons baking powder
1/2 teaspoon baking soda
1/2 teaspoon salt
2 teaspoons cinnamon
1 teaspoon ground ginger
1/2 teaspoon nutmeg
1/4 teaspoon ground cloves
2 Tablespoons soy yogurt (you could use regular yogurt)
2 cups soymilk (or regular cow's milk, if you don't have soy)
15 oz pureed pumpkin, fresh or canned
1/3 cup oil
2 teaspoons vanilla


Sift together dry ingredients. In a seperate bowl, wisk together wet ingredients until well emulsified. Pour wet into dry and combine.  Cook in a waffle iron.


Apple Cinnamon Pancakes


1 apple, any variety (I used Fuji), peeled, cored, and shredded
1 cup flour (I always use unbleached all purpose)
1 tablespoon baking powder
1 tablespoon ground flaxseed
2 teaspoons ground cinnamon
1 teaspoon allspice OR ground cloves
1/4 teaspoon salt
2 tablespoons sugar
2 tablespoons maple syrup
1 cup nondairy milk (I used soymik)
2 tablespoons melted vegan butter (I used Earth Balance)
Canola oil spray

 Peel and core the apple, then shred it. Spray a skillet with a bit of oil and let the apple bits cook for for a bit over medium heat, stirring them occasionally. You want the apple bits to get hot and soft, but not brown - so keep an eye on them while you're working on the next step.

 While the apple bits are heating, mix together your dry ingredients in a large mixing bowl. Add in the milk, syrup, and melted butter, but don't over mix! It will turn your batter to glue, which makes for an oddly chewy pancake. Some lumps in your batter are okay.  I made each pancake with 1/4 cup of batter which made 8 pancakes.


*Just a note: if you're not into trying to bake vegan or you just don't have things like soymilk in the house... just use regular cows milk and margarine or butter.*

Friday, October 8, 2010

Red Velvet Shortbread Cookies-Twelve Weeks of Christmas Cookies- Week 2


A few days ago as I searched the web for recipes to stash in countless folders and notebooks, I stumbled across this blog and the 12 Weeks of Christmas Cookies! 

(Angels Singing)

For those that I know might describe me as Christmas obsessed... I SAY I am blessed with a tad more holiday spirit that the average person.  So I start decorating for Christmas November 1st, in my defense I have a ton of decorations and to get my house Holly & Jolly by December I MUST start the month before. 

I can't help it really, it's my mothers fault. Christmas was always our favorite time of year.  As far back as I can remember there was always cookie baking and candy making going on in our house during the holiday season.  I recall my friends always being wowed that there was fudge, pralines, cookies, etc. all over the kitchen.  I never knew any different and it was just normal.  Now, as I have a family of my own I carry on tradition as best I can for them. 

So, as most people would say.. blah, 12 weeks until Christmas... I say...Hurry up Halloween... bust out the decorations and Christmas music...Hooray!! 12 weeks until Christmas!!!

I missed out on the first week of Christmas Cookies but I'm here now and ready to do some serious cookie baking!!! 

Week 2- Red Velvet Shortbread Cookies

These cookies not only taste amazing, but they are also quick and easy to prepare, a major show stopper AND they freeze well for up to 3 months!  (Just in time for Christmas)

Red Velvet Shortbread Cookies

1 1/4 cups all-purpose flour
1/3 cup sugar
2 tbsp. unsweetened cocoa powder
1/4 tsp. salt
1/2 cup cold unsalted butter, cubed
1 tbsp. red food coloring
2 oz. white baking chocolate with cocoa butter, coarsely chopped
1 tsp. shortening

Preheat oven to 325 degrees.  In a food processor,* combine flour, sugar, cocoa powder, and salt. 

 Cover and process until combined.  Add butter and food coloring. 

 Cover and pulse until mixture resembles fine crumbs and starts to cling.  Continue processing just  until mixture forms a ball.


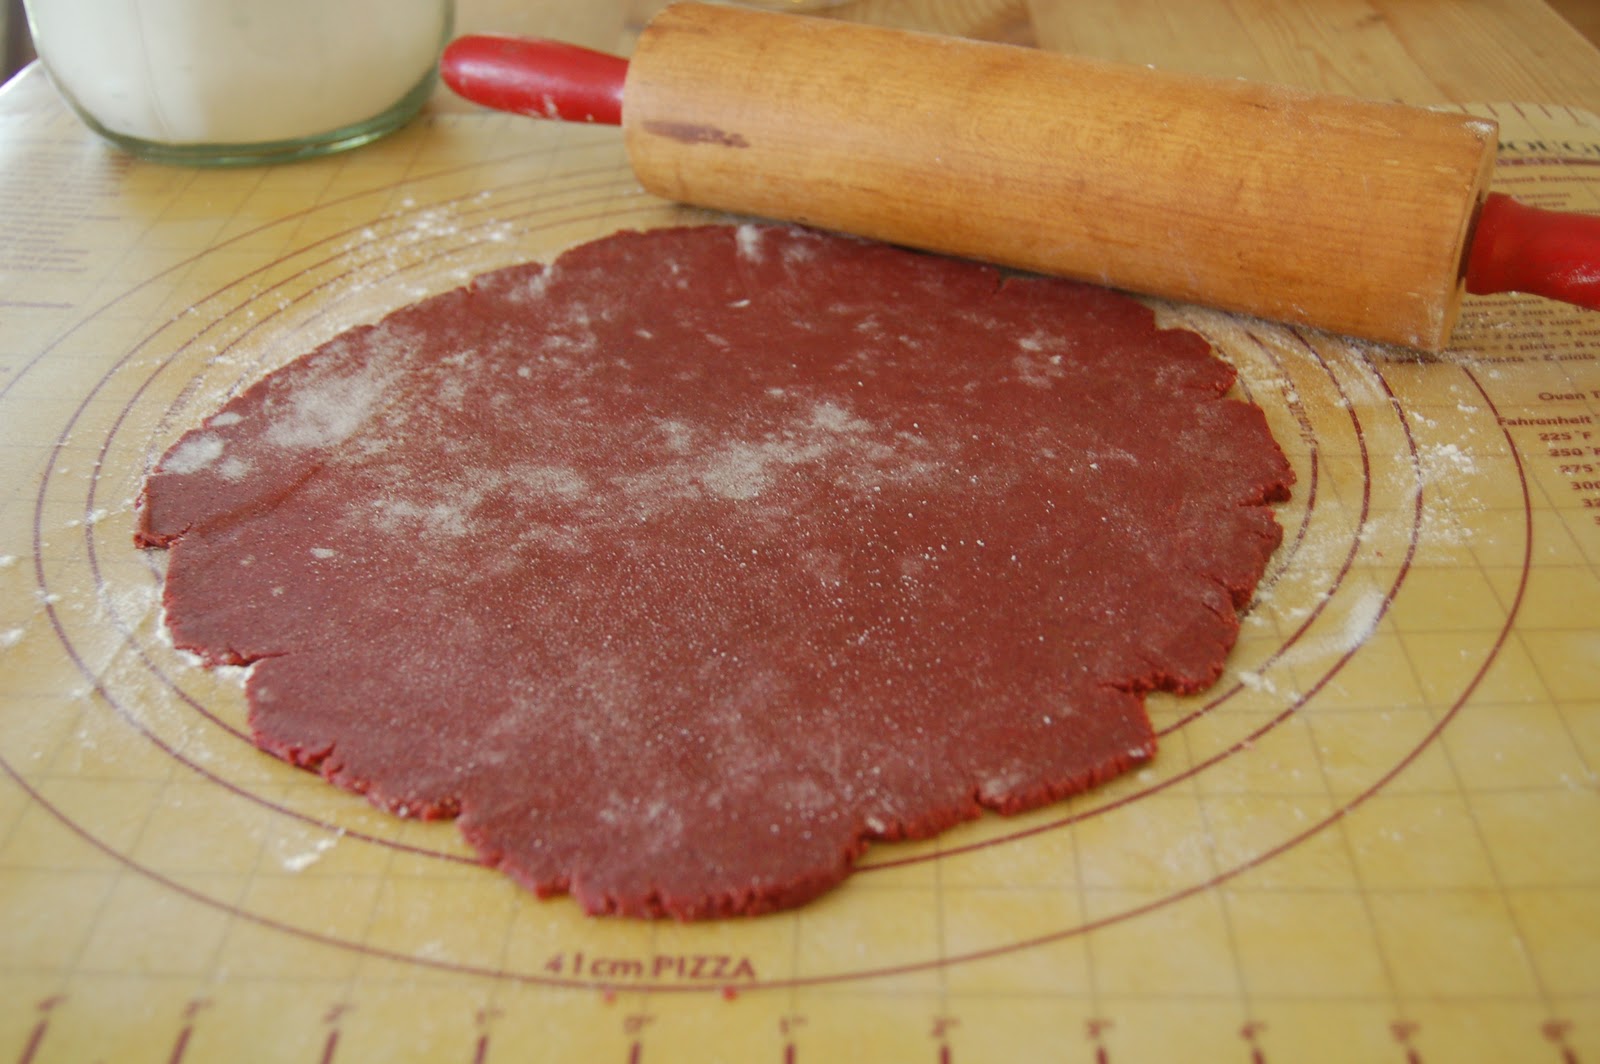
On a lightly floured surface, gently knead dough until nearly smooth. 


Roll or pat dough until 1/4 inch thick.  Cut dough with a floured 1 1/2 inch scalloped round cookie cutter.  Place cutouts 1 inch apart on an ungreased cookie sheet.

Bake in the preheated oven about 20 minutes or until center are set.  Transfer cookies to a wire rack; cool.


For frosting drizzle: In a small saucepan, combine white chocolate and shortening.  Cook and stir over low heat until melted.  Drizzle cookies with melted white chocolate.  Let stand until chocolate sets.  Makes 36 cookies.


*If you do not have a food processor, simply combine the dry ingredients and cut in the butter with a pastry blender or fork.


To Store: Place cookies in an airtight container and store at room temperature for 3 days or freeze for 3 months.


Week 2 Twelve Weeks of Christmas:
<script src="http://www.linkytools.com/thumbnail_linky_include.aspx?id=43875" type="text/javascript"></script>

Wednesday, October 6, 2010

'Tis the Season (Almost)

The holidays are quickly approaching like it or not... me, I like it!  The hustle and bustle of gatherings, shopping, and cooking.  I truely love it but last year was a complete blur.  This year I vowed I would be more prepared for everything.  I started a holiday planning notebook to keep track of gifts, parties and food.  I've cleaned out closets and organized things like my spice cabinet so I'm completely prepared for cooking and baking.  I have also decided to stock my freezer with "go to" dinners and I intend on using these mostly for November and December...possibly January if things don't slow down by then.  The winter my son was born we stocked the freezer and it was a life saver, so this year I'm doing the same and I'll be sharing all the tips and recipes I find.


My first item to go in the freezer... Pizza dough.  We eat pizza in our house about once a week and I have a hard time spending over $5 on a frozen pizza in the store.  My solution we just make them and until now I've bought the ready made pizza crusts.  Here's what I did:

Pizza Dough


1 pkg. active dry yeast
1 ½ c. very warm water
18oz. (4c.) flour
1tsp. Salt
2 tbsp. olive oil

Dissolve yeast in the warm water and set aside. Meanwhile, put the flour and salt in the food processor and process briefly to mix. With the machine running, add the water-yeast mixture in a steady stream. Turn the processor off and add the oil. Pulse a few times to mix in the oil.
Turn out onto a floured surface and with lightly floured hands knead dough until smooth adding in a little more flour. Cut dough into sections and place in freezer bags. Lasts for 1 month in the freezer.
To make immediately, cover dough with a dishtowel and let rise until almost double in size, about 45 min.
To make tomorrow, line a baking sheet with a floured dish towel, place dough balls on it, and cover them with plastic wrap and let them rise in the refrigerator overnight. To use dough that has been refrigerated overnight, simply pull it out of the refrigerator about 15 min. before shaping the dough into a pizza.


*This recipe makes 2 regular size pizzas or 4 personal size.